How It Works
This connector creates a secure bridge between your S3 buckets and Cloudglue using IAM Roles:- Direct S3 access - We only access your files when you explicitly use them.
- No manual uploads - Skip the process of manually uploading files to Cloudglue.
- S3 URI support - Use your existing S3 URIs directly with Cloudglue endpoints.
Overview
- Configure S3 using either the CloudFormation template or the manual setup process.
- Provide the role ARN and your
externalIdto Cloudglue. - Configure the connector on our web platform.
AWS Setup
Option 1: CloudFormation Template (Recommended)
We provide a CloudFormation template that automates the AWS setup process, handling IAM role creation, policies, and trust relationships.CloudFormation Template
You can download the template here.View template contents
View template contents
- Download the template file.
- Navigate to the CloudFormation console in your AWS account.
- Click Create stack (with new resources).
- Select Upload a template file and upload the
.yamlfile. - Name the stack, set your
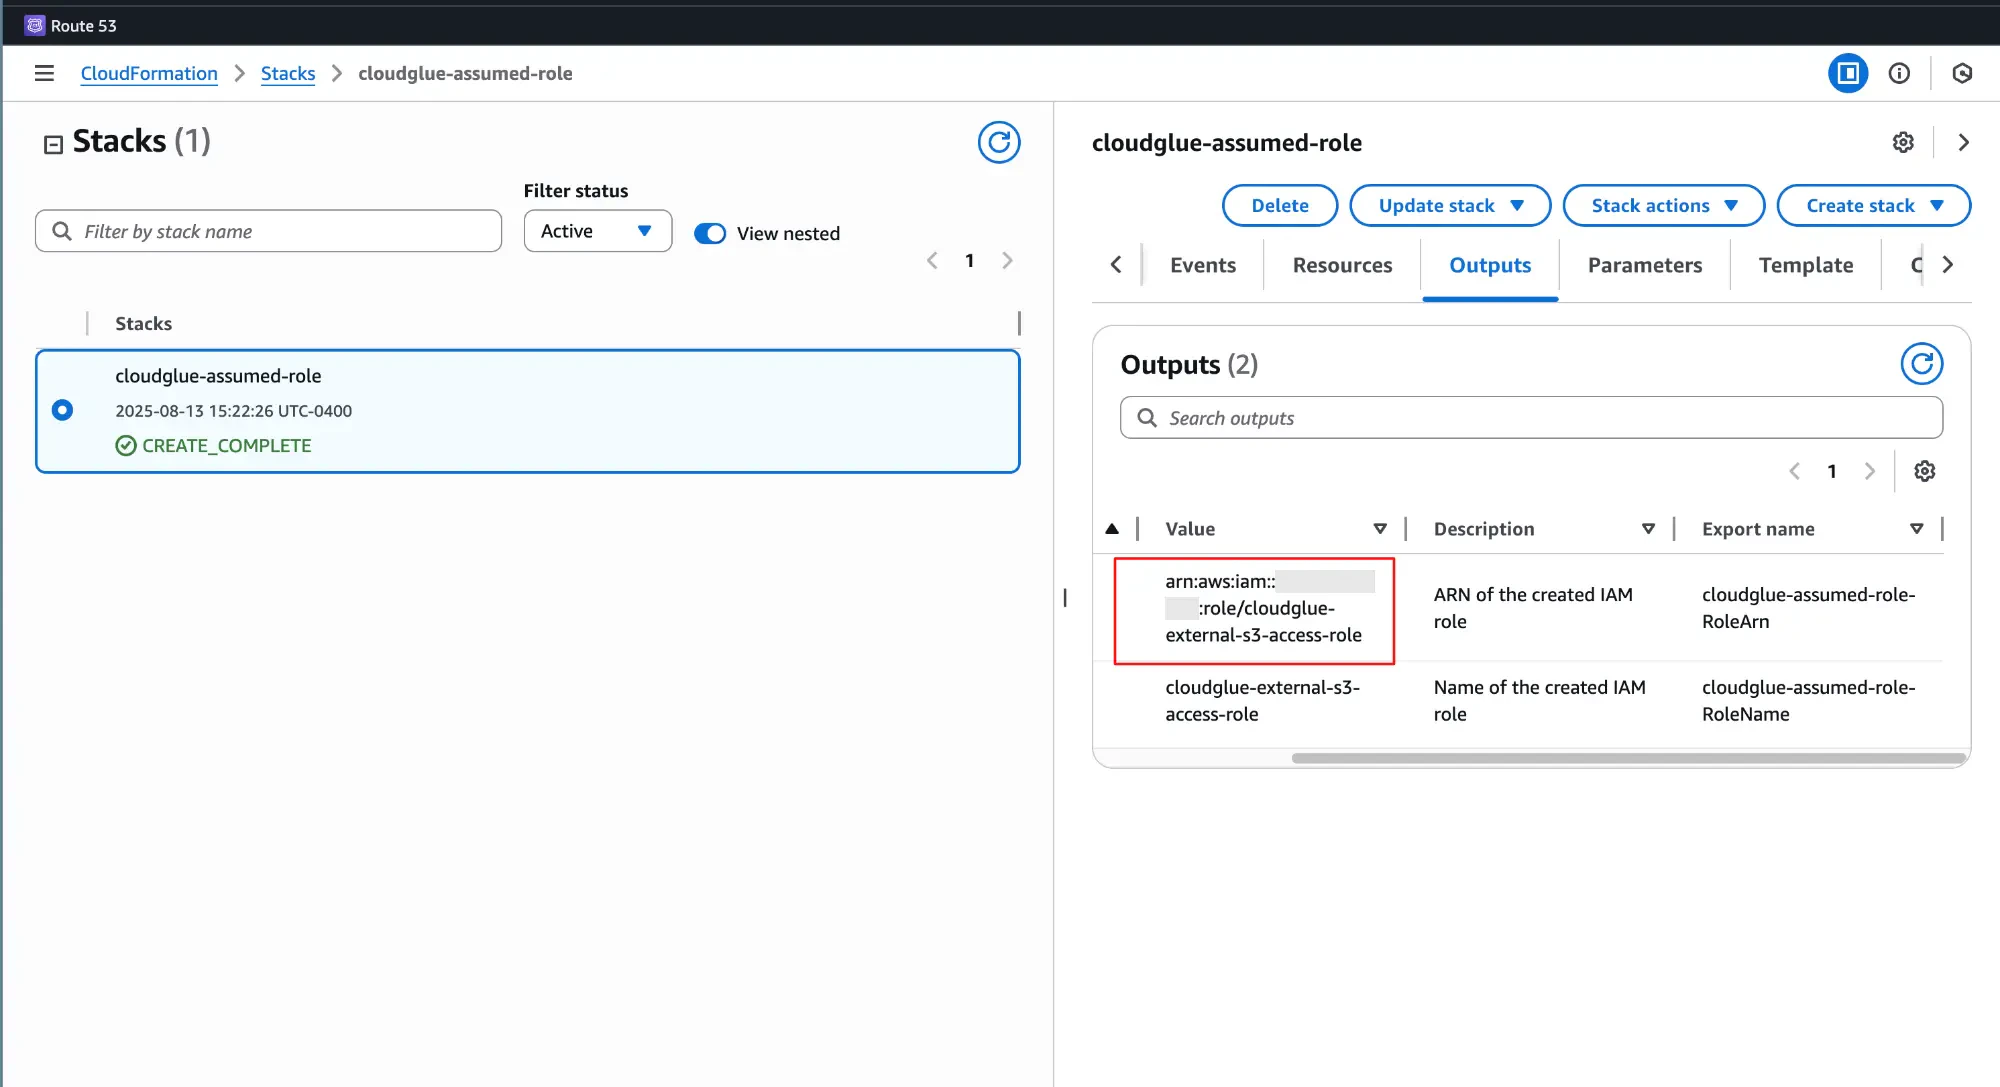
BucketName, and theexternalId. - Deploy the stack.
Option 2: Manual Setup
If you prefer manual configuration, you can create the required IAM role and policies yourself. To create the role- Navigate to the IAM console -> Roles.
- Click Create role.
- Select AWS account as the trusted entity.
- Select Another AWS account and enter our account ID:
992382634011.
- Click Next. Skip the permissions page (we will add an inline policy later).
- Name the role
cloudglue-external-s3-access-role. - Click Create role.
- Open the role you just created.
- Click Add permissions -> Create inline policy.
- Use the JSON policy editor and paste the following:
Role Policies
- Click Next.
- Name the policy and click Create policy.
Trust Relationship
The trust relationship is already attached to the role, so you can skip this step.View trust relationship
View trust relationship
Want to learn more about trust relationships? See the AWS documentation on
trust policies with IAM
roles.
Need help with CloudFormation templates? Check out the AWS CloudFormation
Templates
resources.
Connecting to Cloudglue
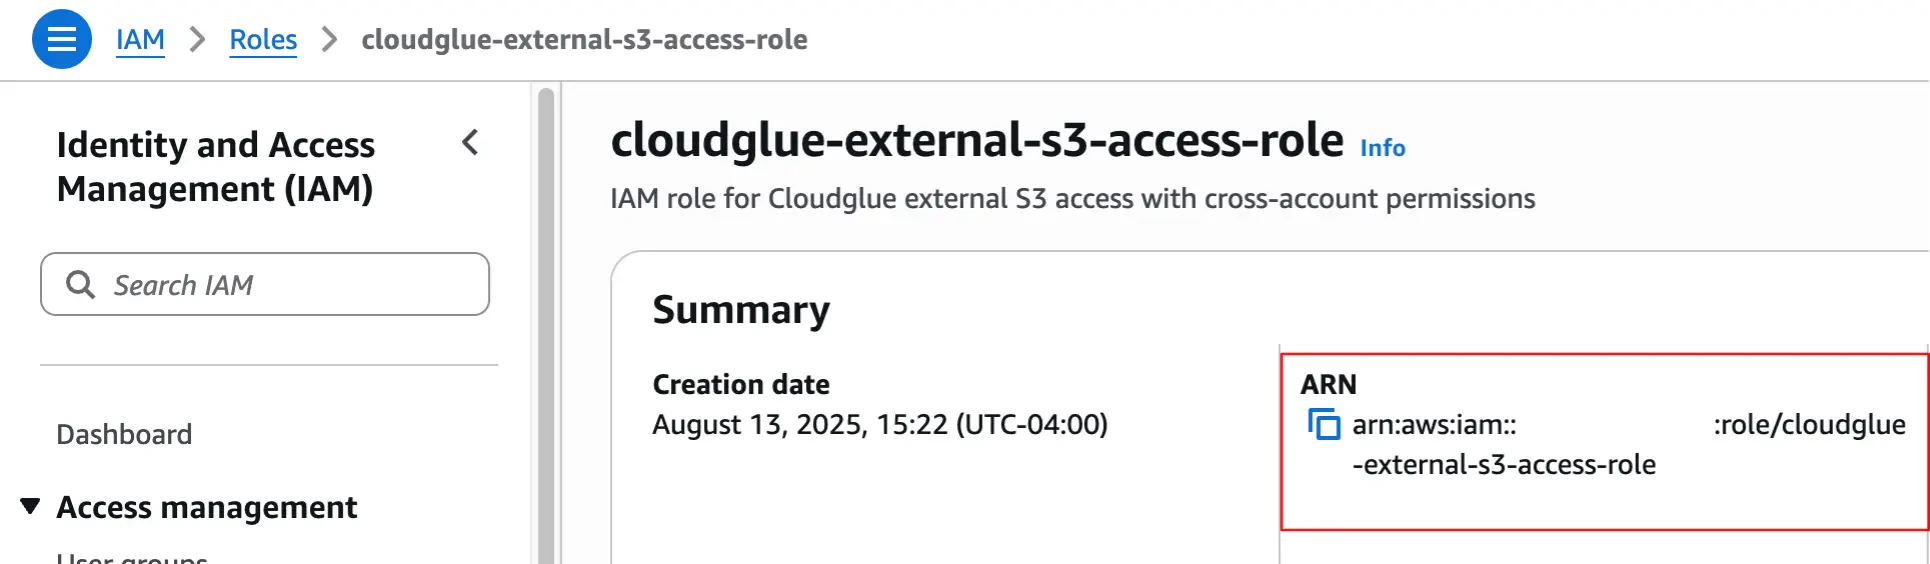
- Get the role ARN and
externalIdfrom your AWS account.
- CloudFormation
- Manual
- Navigate to Cloudglue data connectors, selecting the AWS S3 card, and complete the form.
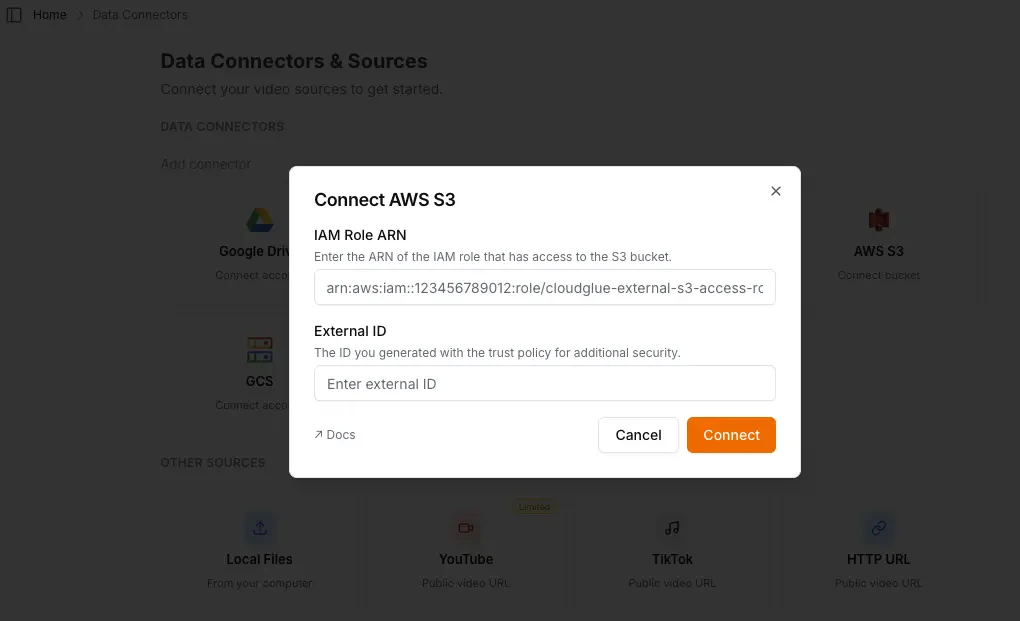
Ready to set up your data connector? Visit our
app to configure your S3
connector.
Need help setting up your data connector? Contact our team directly for
assistance with the setup process.
Managing Access
You maintain full control over your data access. Remove this data connector by doing any of the following:- Revoke access by deleting the IAM role.
- Modify permissions by updating the role policies.
- Remove connection by revoking the connector on our website.
- You cannot import new recordings into Cloudglue until you reconnect.
- Any recordings you previously imported will remain in Cloudglue. These can be viewed and deleted from File Management.
Adding more buckets
If you need to add more buckets to the connector, you can do so by modifying the policy attached to the role. All you need to do is add the new bucket to theResource array.
How to use your S3 files with Cloudglue
To use S3 files, you can use the S3 URI for a file in your Cloudglue API requests. This would be prefixed withs3://.
Example:
Security
We use AWS best practices with cross-account IAM roles. This approach:- Maintains your control - You own and manage the role.
- Follows AWS security patterns - Uses standard cross-account role assumption.
- Provides granular permissions - Only grants the minimum access needed.
- Easy to revoke - Simply delete the role or modify permissions.